• Skip to primary navigation
  • Skip to content
  • Skip to primary sidebar

Collision Blast

Providing FREE Auto Body and Paint Training Videos

  • Home
  • COLLISION SCHOOL
  • Blog
  • Shop
    • Used & Aftermarket Parts Search
    • Starter Tool Kit
    • Auto Detailing Supplies
    • Touch-Up Paint
    • Ceramic Paint Coating
    • Haynes Repair Manuals
    • Vehicle History Report
    • How To Draw Cars
    • High Performance Parts
    • Car Addict Garage T-Shirts
  • Lessons, Projects…
  • Touch-up Paint
DIY Auto Welding Tips – Welding a Section Weld on a 66 Ford Mustang

DIY Auto Welding Tips – Welding a Section Weld on a 66 Ford Mustang

October 23, 2012 by Donnie 1 Comment

We set the quarter in place after applying the 8115 Panel Bond adhesive and used self tapping screws to secure it.  The we allowed the panel bond to dry.  Panel bond is an adhesive that work well for installing panels.  However, there are still locations on most panels where I would prefer to weld.  I have even heard of people using this adhesive for their sectioning location (where the quarter attaches to the sail panel) but I feel much better welding this. 

I am also going to plug weld all of the rear welds along the tail light and rear body panel and a few plug weld on the front (quarter to pillar) area. 

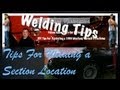
 We plug welded all of the plug weld locations using a MIG welder. Then we welded the section location using a combination of plug welds and lap welds.  As mentioned in the video, it is important for all parts to be secure.  Self tapping screws, rivets, or clamps can be used.  You may also need to push or hammer areas to be certain the parts are secure.  You do not want to weld if there is a gap between the two panels being welded.

Care must be taken not to overheat the metal when welding.  If overheated, this will cause the metal to warp.  One method to help eliminate this problem is to alternate you weld locations by making short welds.   This is not going to make the prettiest welds, as with a continuous weld, but we are going to grind them off anyway.

Once welded, we use a grinder to grind the welds.  The we can apply fiberglass filler or seam sealer depending on the location to seal the weld to prevent corrosion from occurring later on. 

To stay updated for more auto body and paint training and news, please subscribe to us at http://CollisionBlast.com

Filed Under: Auto Body and Paint Videos Tagged With: 1966 mustang, 1966 Mustang Project, 66 mustang, automotive welding, mustang restoration, welding

About Donnie

`The information provided on this website is for educational and informational purposes only and solely as a self-help tool for your own use. It is the responsibility of the viewer to First read the Technical Data Sheet, Material Safety Data Sheet, and any other instructions for each product, tool, or equipment used and to follow the safety recommendations of the manufacture. CollisionBlast.com assumes no liability for property damage or injury incurred as a result of any of the information contained on this website. There are no warranties or guarantees of the results of the viewer after reading or watching the content on this website. The results will vary according to each individuals talents, knowledge, and skills. Some of the links on this website may be advertisements or affiliate links. This means that if you click on the link and purchase the product I may make a small commission.'

Comments

  1. Useful Tips for Welding Services says

    February 11, 2014 at 12:44 pm

    Your welding tips are very useful. By following your tips, one can easily try to do a welding practice.

    Log in to Reply

Leave a Reply Cancel reply

You must be logged in to post a comment.

This site uses Akismet to reduce spam. Learn how your comment data is processed.


Shop Millions of Auto Parts at LKQ Online

  • Basic Training Course
  • Schools
  • Consumer
  • Interviews/Stories
  • Eastwood Series

Copyright © 2021 · Aspire Pro on Genesis Framework · WordPress · Log in